CSV Upload Tool
Import CSV files into the custom schema using the CSV upload tool.
Purpose
The Data Upload tool allows users to take CSV data and:
- Create table in the custom schema when no table with the same name already exists
- Append to table when a table with the same name already exists in the custom schema
- Replace table when a table with the same name already exists in the custom schema
How it works
When you upload a .csv file, Relevant will search your custom schema for a corresponding table with the same name as the file. For example, if you upload a file called my_data.csv, the tool will search for the table my_data in the custom schema (Relevant will also “downcase” the filename, so if you upload a file called ‘MyData’, Relevant will search for a table called ‘mydata’). If no such table exists, the upload option will be Create table, which creates a new table with the columns specified by the header row of the CSV. If a table with that name already exists, you can choose Append to table or Replace table.
When importing a .csv to create a new table in the custom schema, all columns will be created with the VARCHAR data type, and the data will be cast to VARCHAR accordingly. The same is true when using the Replace table option, since Relevant drops the existing table and creates a new one from the CSV headers. For example, the date 4/25/21 in the CSV will be stored in the data warehouse as the text 4/25/2021. It will not be stored as a date and will not respond to date functions.
As a workaround, you can create a transformer to customize the data types of the new table you’ve imported into. Feel free to reach out to support@relevant.healthcare if you’d like help doing so.
Column and data constraints
In order to successfully import a CSV, keep in mind the following:
- The filename and header row of your .csv file must contain Postgres-compliant table/column names. For example, SQL keywords like “TRUE” or “FALSE” cannot be used as a column name.
- The .csv file must contain comma-separated values that comply with the RFC 4180 CSV spec. If a value contains a double quote, it must be escaped by another double quote.
Here’s an example of column headers plus two rows of valid data:
- “Id”, “desc”
- “1”, “value, with a comma”
- “2”, “value with “”escaped double quotes”””
Here’s an example of column headers plus two rows of invalid data:
- “Id”, “desc”
- “1”, value, with a comma
- “2”, “value, with “unescaped double quotes””
When importing a CSV into an existing table in the custom schema using Append to table, also keep in mind the following:
-
The case (upper or lower) of the column names in your .csv file must match the case of the column names in the table you are trying to import into in the custom schema.
-
The spelling of the column names in your .csv file must match the spelling of the column names in the table you are trying to import into in the custom schema.
-
The data types of the columns in the .csv file must be castable into the data types of the columns in the table you are trying to import into in the custom schema. In other words, each field value in the .csv file must be able to be cast into the data type of the respective column in the custom schema table. For example, if the field value is “1/2/2021”, it can be cast into a PostgreSQL ‘date’ or ‘text’ data type, but not an ‘integer’ data type.
When importing a CSV using Replace table, keep in mind the following:
- Relevant will permanently delete the existing table with the same name before creating a new one from the CSV file.
- The new table will use the CSV header row for its columns, and all columns will be created as VARCHAR.
- If the existing table has dependencies, Relevant may not be able to drop it until those dependencies are removed.
Other things to know
Note: column names in your .csv file that are separated by spaces (for example, “Date of Birth”) will be wrapped in double-quotes in the table you upload into, and will have to be referenced using double-quotes.
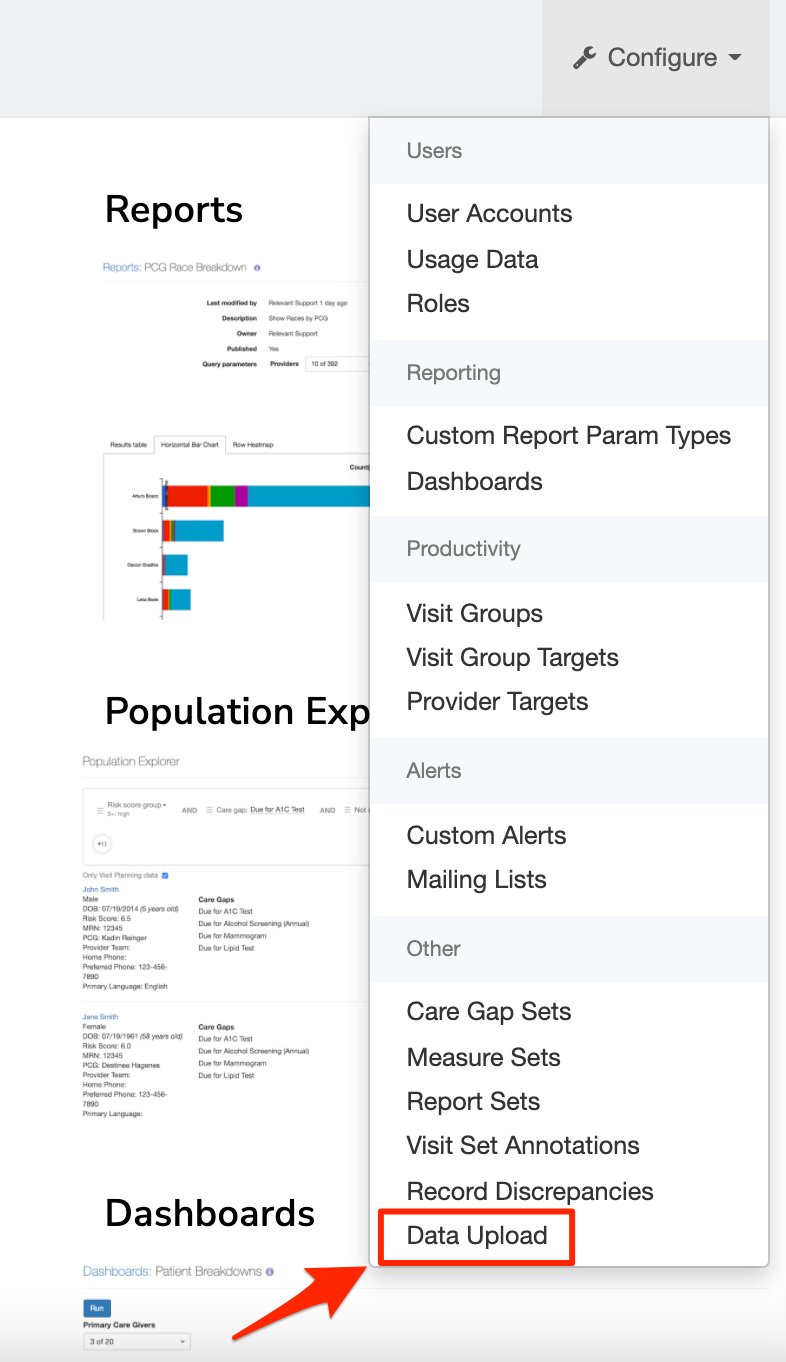
Where to upload
1. The CSV upload tool can be found in the Configure menu, which is in the top right corner of Relevant. Note: this tool will only be accessible if your user account has been granted “Manage Data Pipeline” and “View PHI” abilities.