How to use your Querying Tool
Once you’ve set up a connection to Relevant’s Data Warehouse, you can begin writing queries in your querying tool. The following screenshots should orient you to the basic features of your querying tool so that you can use it to write custom reports.
Note: the following screenshots are of Datagrip, one of many querying tools out there. The basic features that will be shown below are found in pretty much all of these tools, so it’s still worth it to keep reading even if you’re using another tool. It’s also useful to go to your specific querying tool’s website to read the documentation and/or watch training videos to learn how to use the tool.
The Basic Features of DataGrip
Once you install DataGrip and connect it to Relevant’s Data Warehouse, it’ll typically look like this:
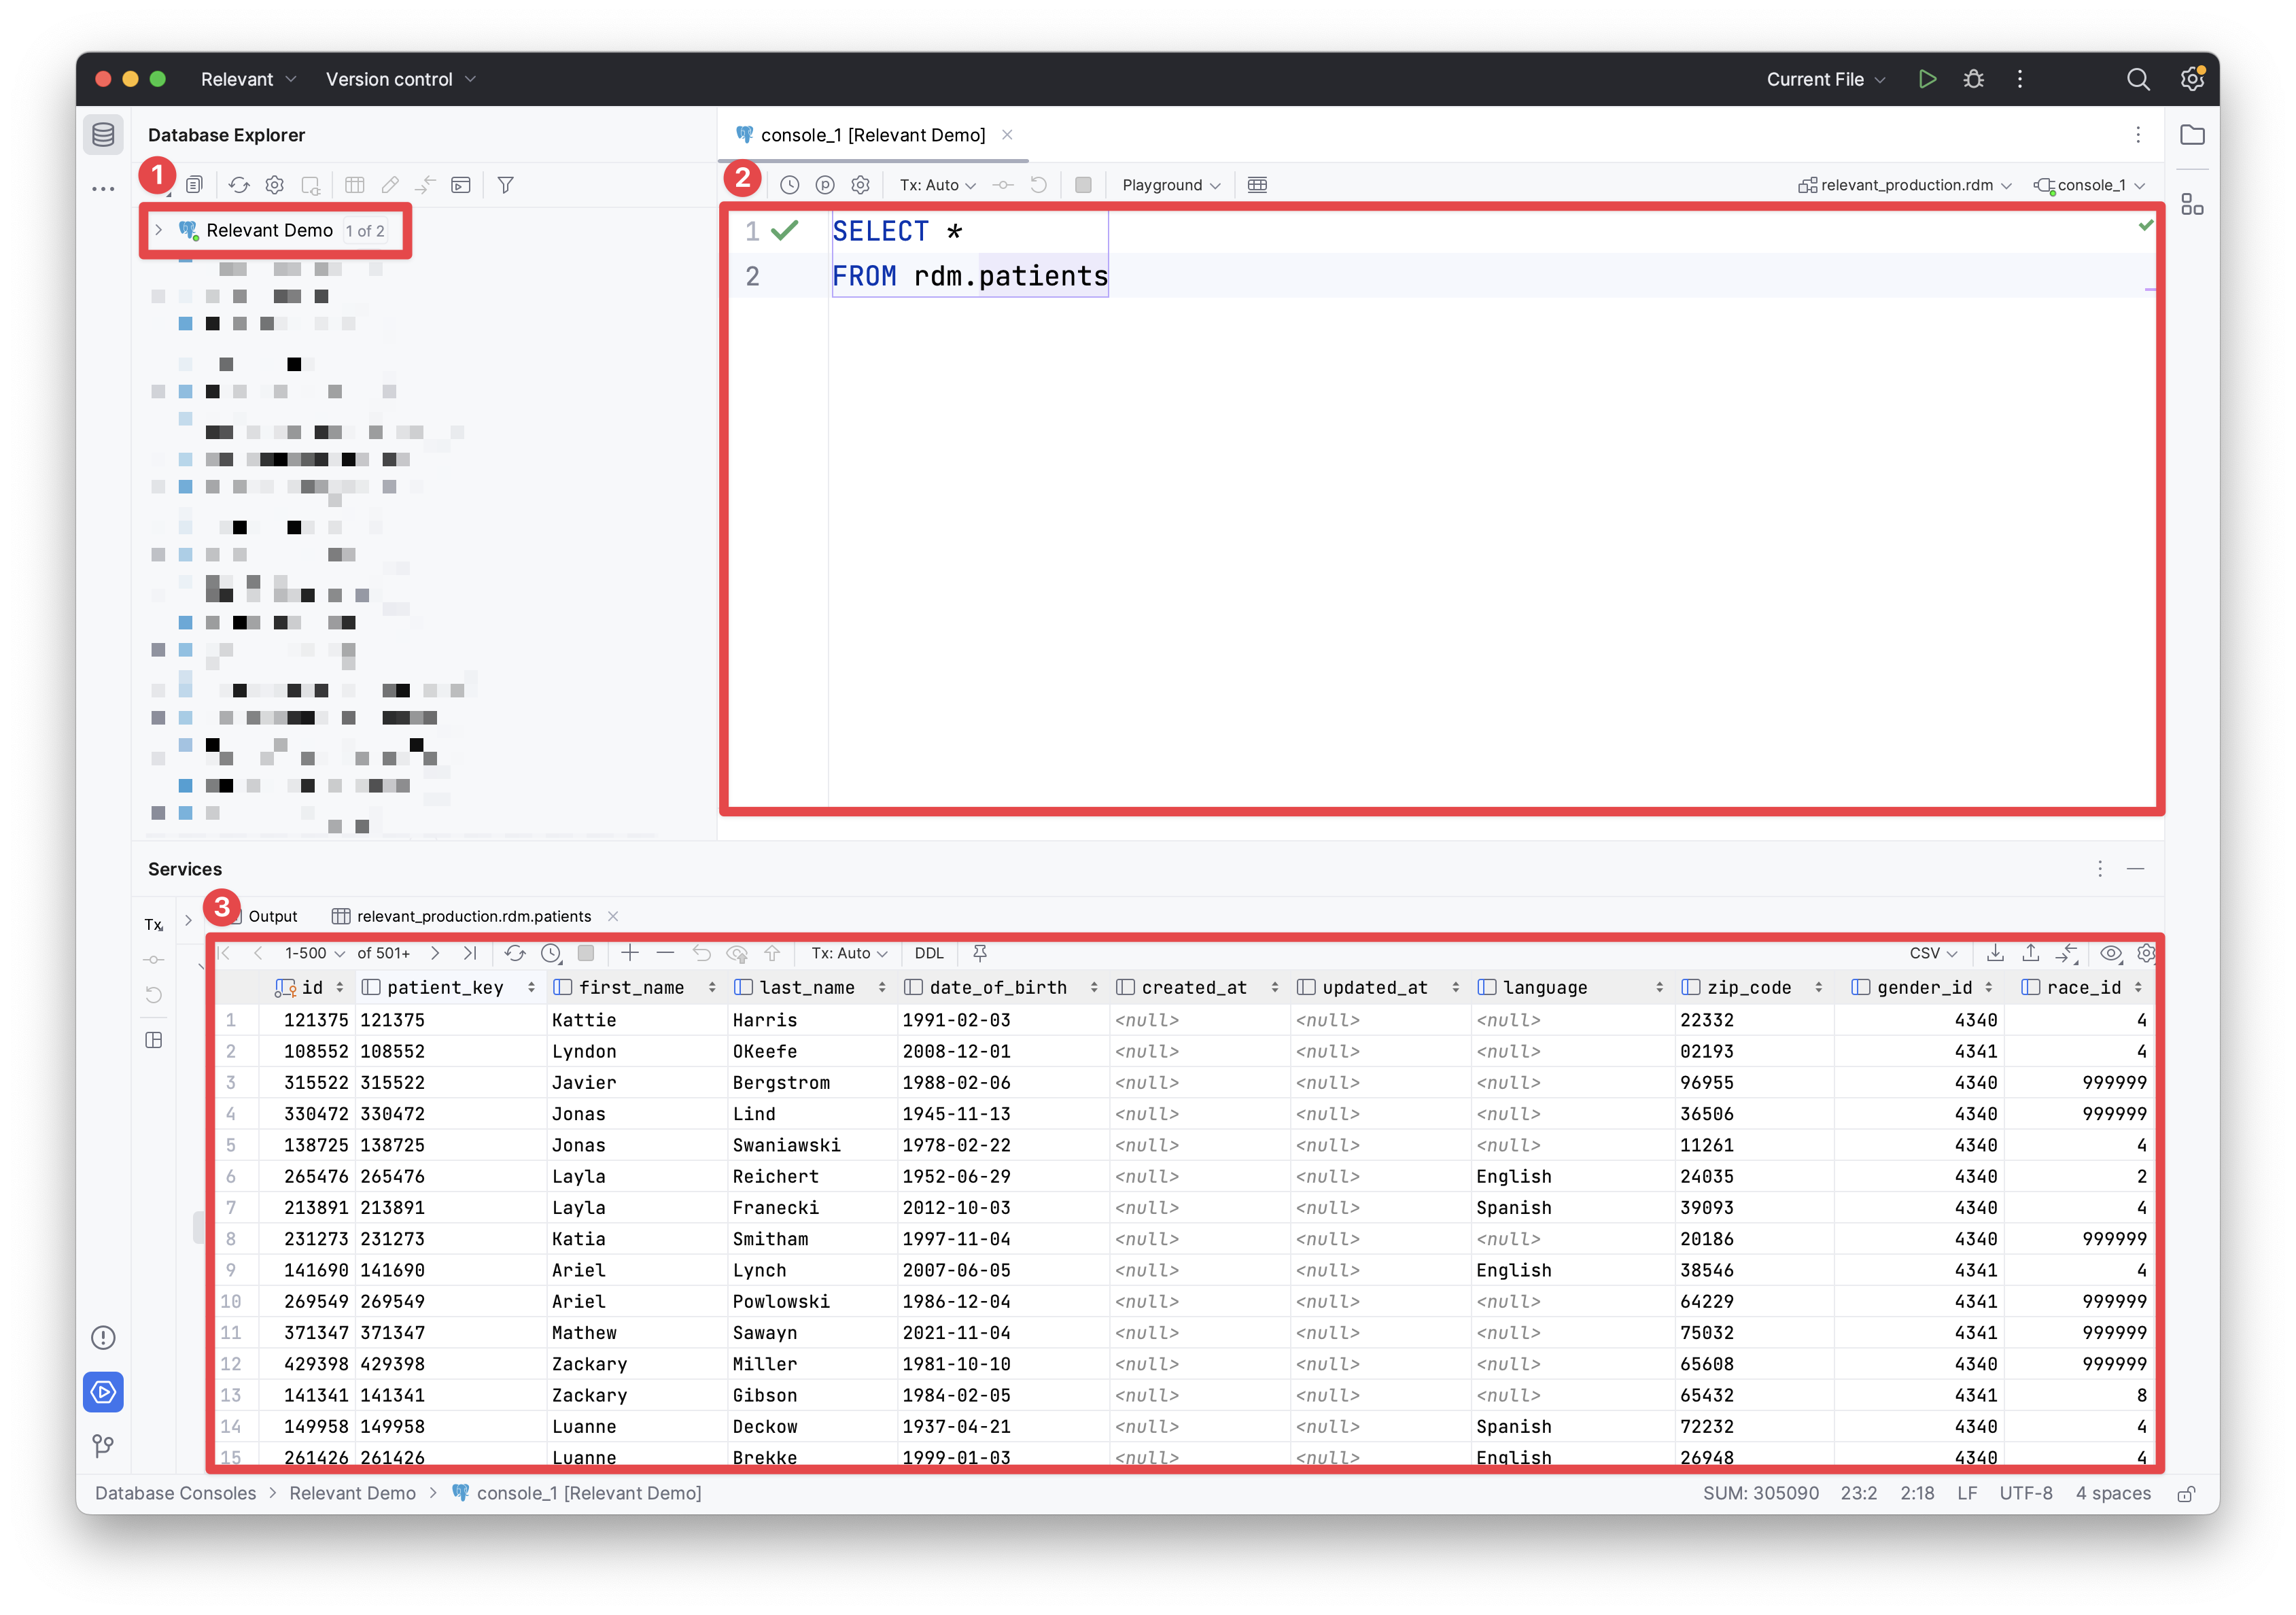
#1 points to the “ Database panel”, which shows your existing databases connections. In this example, we can see a connection to the Relevant database.
#2refers to the “ Console” which is an area where you can write queries off of a particular database connection. The screenshot above shows the following query: SELECT * FROM rdm.patients, which will query the patients table which lives in the rdm (relevant data model) schema in the Relevant Analytics Database.
Learn more about schemas and search paths.
#3points to the “ Results panel” which is the space where the results of your query will display. Since the query ( SELECT * FROM patients) retrieves all of the data in the patients table, the Results panel shows all of the data in the patients table.
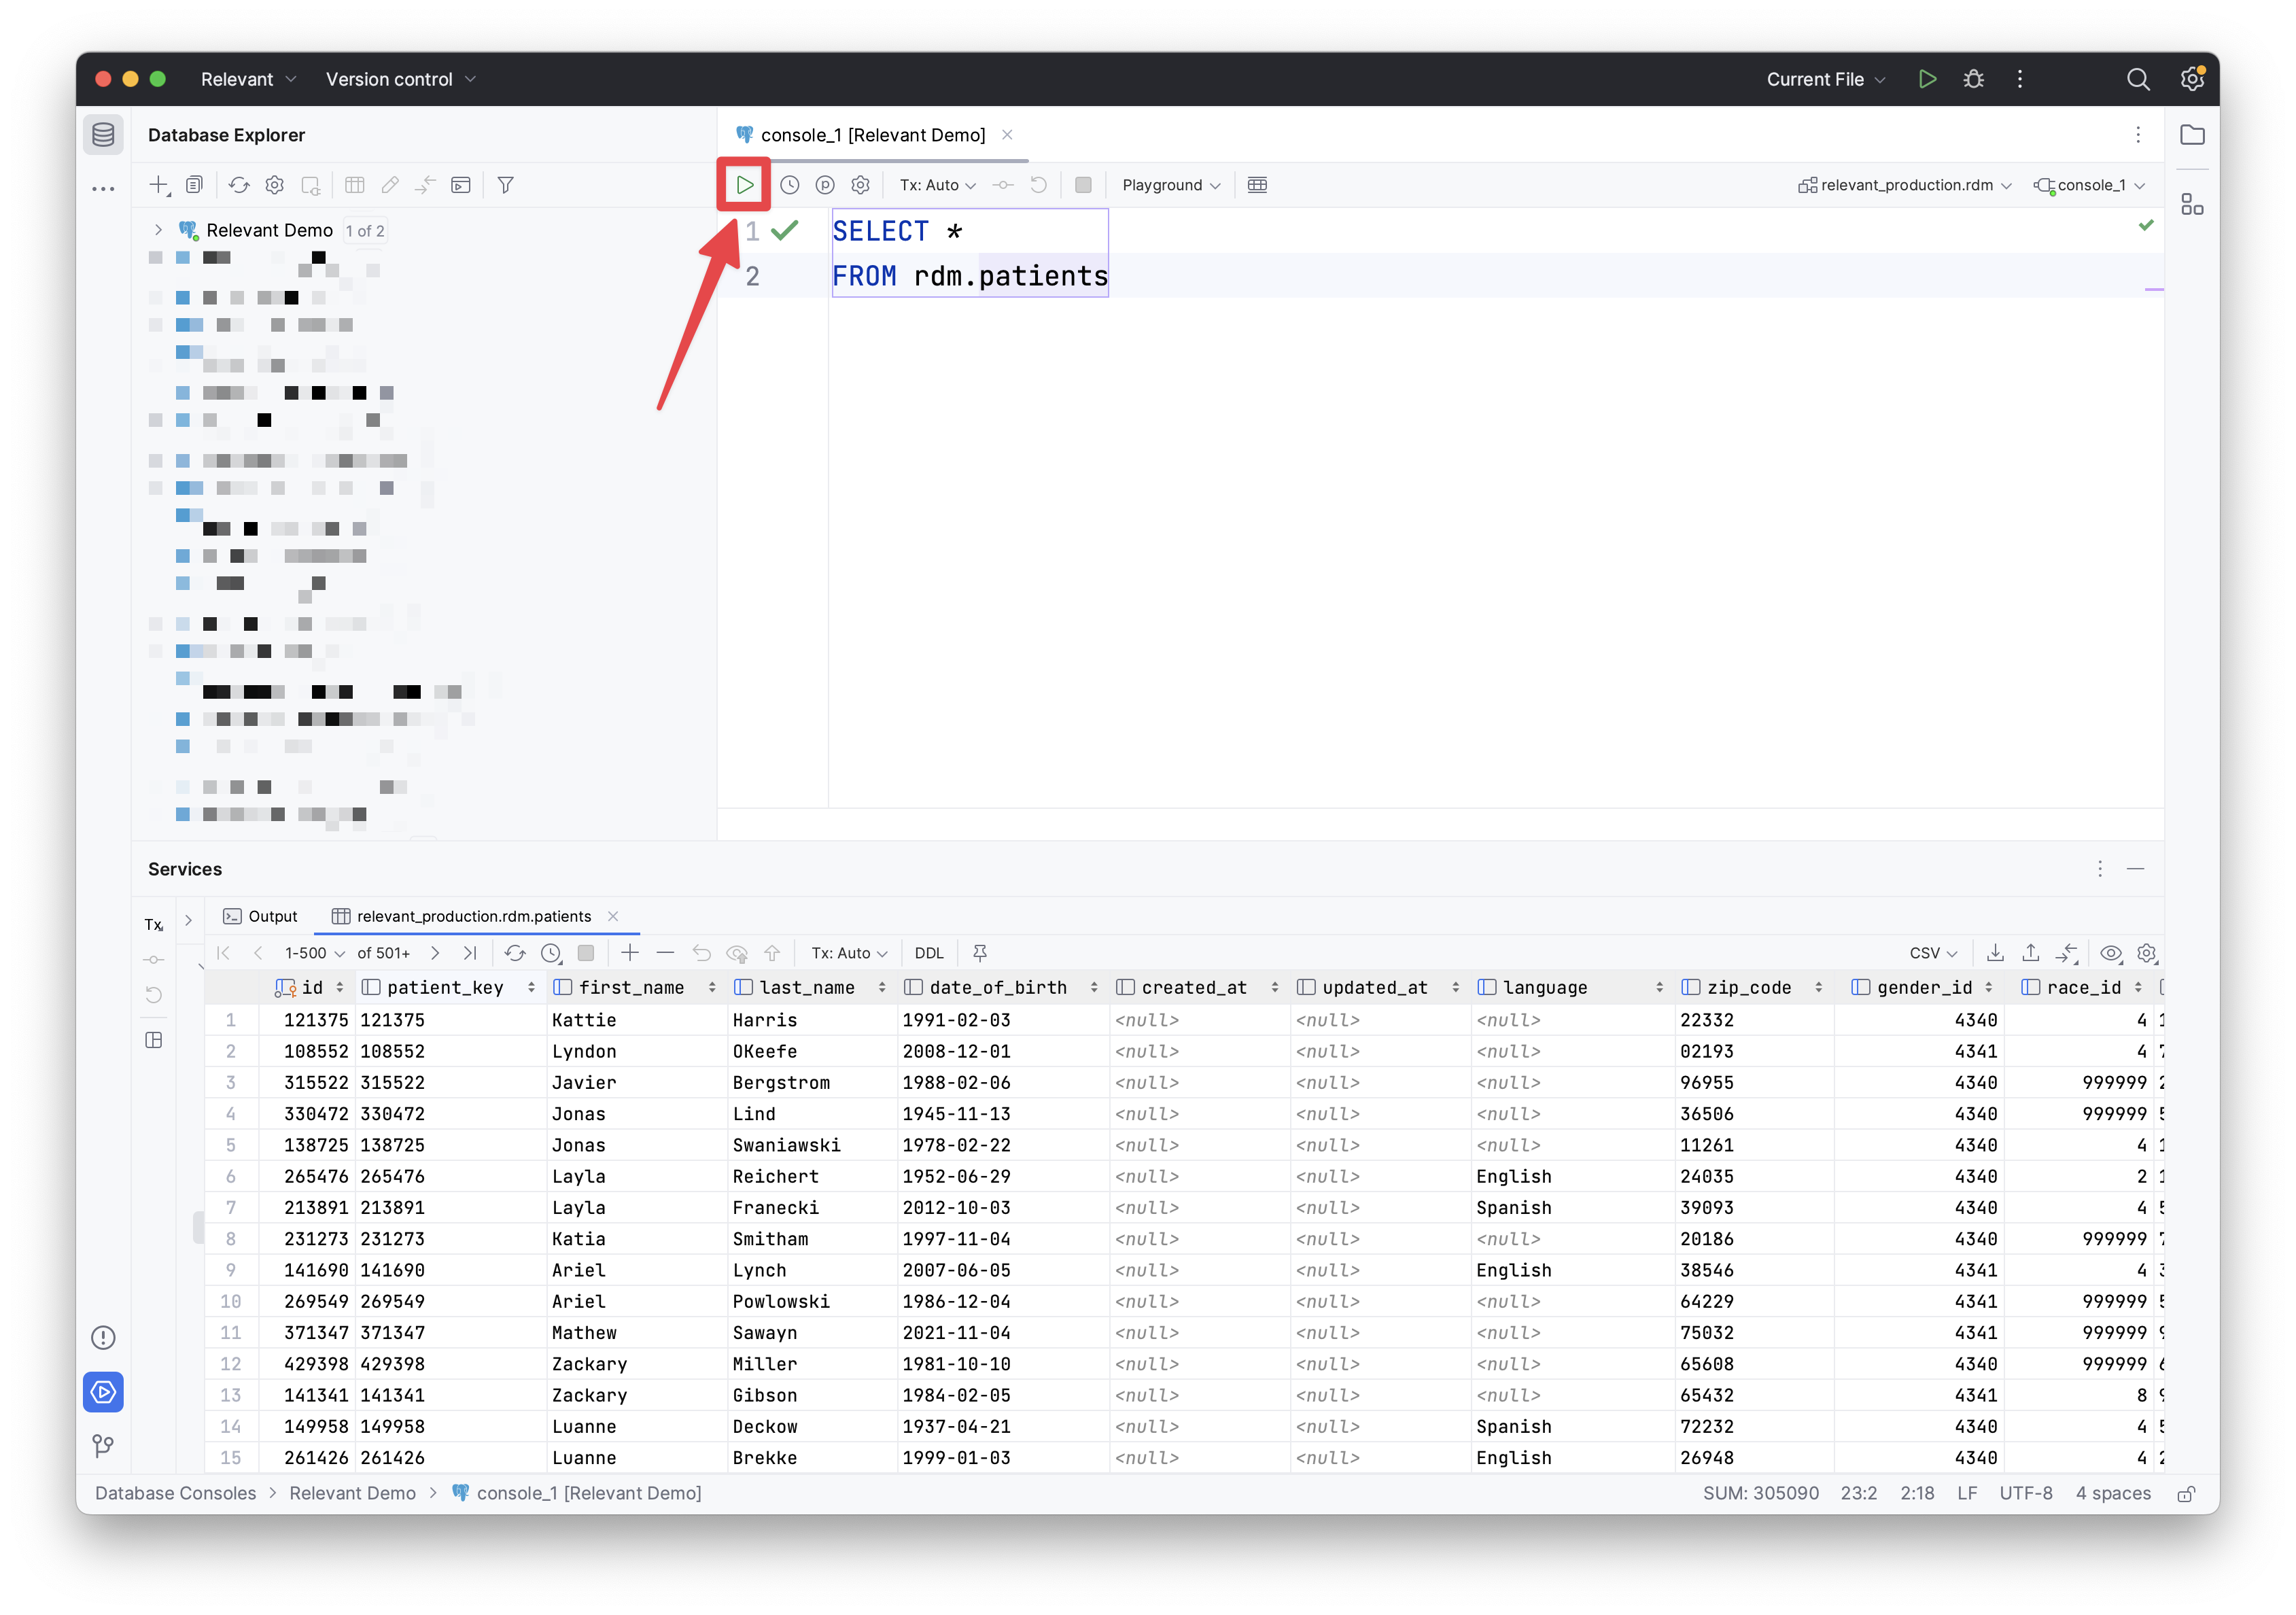
How to execute a query (so that it shows you the results)
To execute the query so that the results get displayed, click the green “Play” icon in the top left corner of the console, or hover over it to see the keyboard shortcut displayed.
How to find out what tables are in a database
There’s two ways to do this.
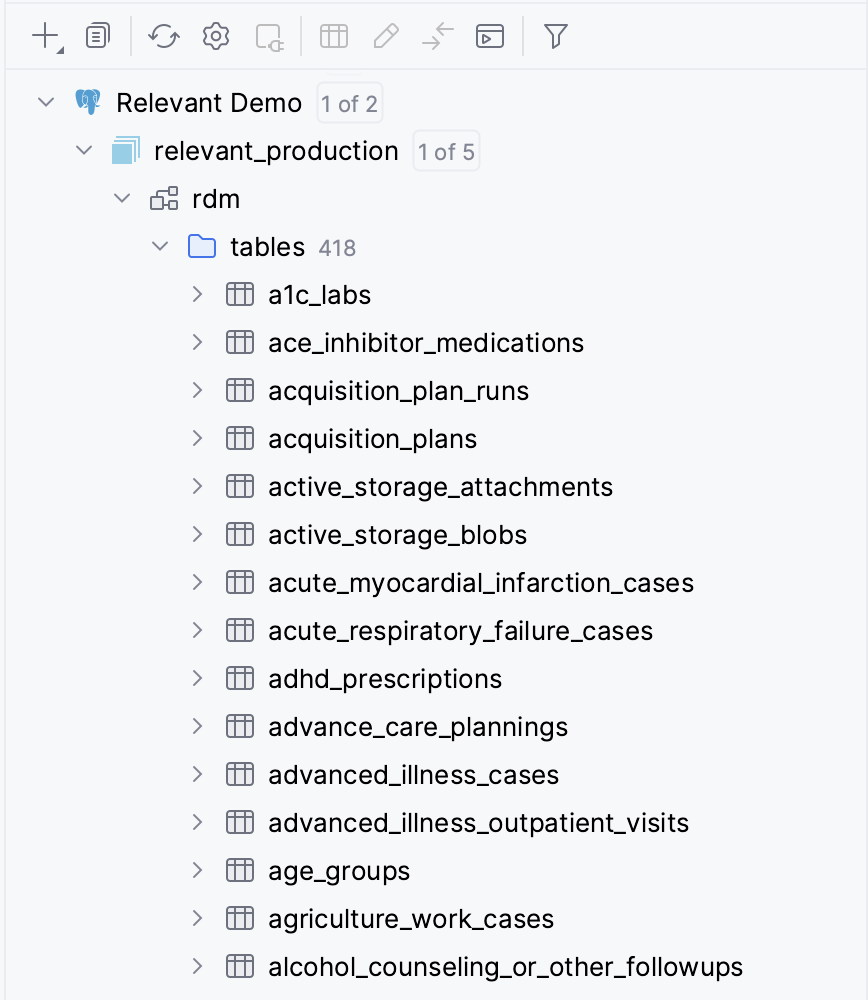
- In the Database Panel, you can explore the different tables in a database by clicking on the grey “caret” or arrow to the left of the database connection name. In the example below, we want to see the tables in the Relevant Analytics Database connection. Clicking the first arrow opens the databases folder, where we select which database we want to see the tables for. In this case, we want to view the tables for the
relevant_productiondatabase. Then, we need to click on the schema we’re interested in, which is therdmschema. Finally that’ll show us the list of tables in this schema. Clicking on the caret next to the table will also give us the names of the columns in each table, as well as the data type of each column.
2. You can query the information_schema table of the database. All PostgreSQL databases contain a table known as the “ information_schema” which contains information about the contents of that database.
To pull a list of all tables in the database from all schemas, paste in this query into the console:
SELECT table_catalog, table_schema, table_name
FROM information_schema.tables
WHERE table_schema NOT IN ('information_schema', 'pg_catalog')
ORDER BY table_name;
To pull a list of tables from a specific schema, like rdm, paste this query into the console:
SELECT table_catalog, table_schema, table_name
FROM information_schema.tables
WHERE table_schema = 'rdm'
ORDER BY table_name;
To pull a list of all of the table and each of their columns in a database, paste in this query into the console:
SELECT table_catalog, table_schema, table_name, column_name, ordinal_position, is_nullable
FROM information_schema.columns
WHERE table_schema NOT IN ('information_schema', 'pg_catalog')
ORDER BY table_name, ordinal_position;
Advanced Datagrip tips
When copying SQL from Relevant reports, measures, or similar, you may encounter double curly braces around parameter names, like {{start_date}}, which need to be replaced before running the query. Instead of manually filling these parameters in before running the query, Datagrip can be set up to handle this parameter format. Open Settings > Database > Query Execution > User Parameters, and add the following parameter pattern: \{\{(.*?)\}\}.